Developing apps for Linux and Windows on any platform is accessible while building software for Mac is not as easy as on other platforms. Building apps on Mac requires an SDK called Xcode. Xcode is an integrated development environment (IDE) that consists of a set of software development tools designed by Apple, specifically for developing software on Mac OS X and iOS.
The app development kit, Xcode, is not available for any other operating systems except Mac OS X and iOS. There are many reasons and compatibility issues behind this unavailability. If you are pretty firm in installing Xcode on your Windows PC (7, 8.1, and 10) and check the working process of the SDK framework/development kit on Windows OS, then here is a detailed way how to install Xcode on Windows 7 and 8/8.1 and Windows 10 PC.
Xcode – App Development Kit
Xcode is an application development kit or SDK containing software development tools designed for Mac OS X. Xcode is an interface builder that can also be considered a testing application and an asset management toolkit. Here is a method to install Xcode on Windows PC (7, 8, or 8.1 and 10) using Oracle VirtualBox. Hence, you can create and develop essential apps on your Windows PC by installing this Xcode SDK on your Windows OS.
Requirements to Install Xcode on Windows 7/8/10 OS
In this article, we will explain in a detailed way how to install Xcode on Windows 7, 8, or 8.1 and 10. Before initiating the installation process, you need to have the following system requirements:
- A working Mac OS X virtual machine on VMware or VirtualBox.
- Downloaded the Xcode package from Apple. You need to have Apple ID to download Xcode from the Apple store.
- Dual-Core Intel processor
- Minimum 2GB of RAM (Recommended: 4 GB+)
- Hardware Virtualization
If you are a professional app developer, you have to purchase Apple hardware with OS X and app developer ID. Using Xcode on your Apple hardware would best test the app on an actual Apple device. As we are using Virtual Box to install Xcode on Windows, ensure you have a working Mac OS X virtual machine. If you don’t have a copy of an installed Virtual Box, you can download it here, as it is free and open-source.
Steps to Install Xcode on Windows 10, 8/8.1, and 7 PC or Laptop
Follow the below steps to install Xcode on Windows 10, 8, or 8.1 and Windows 7 desktop or laptop for iOS SDK.
Step 1: Download and install VMware or VirtualBox on your Windows computer from the above link.
Step 2: You must download and install OSX Mavericks ISO as a virtual machine.
Step 3: You have to create the virtual machine on your oracle virtual box. For that, you need to open Virtual Box and click New.
Step 4: Now, you will get a new window asking for the name of the new operating system. Enter Name as OSX, Type of the OS as Mac OS X, and enter the Version as Mac OS X (32 bit). Click Next.

Step 5: You must select the size of RAM for the virtual machine. The sufficient size of memory for Android to run on your Windows computer requires 1024 MB (1 GB). Select the memory size and then click Next.

Step 6: Select and create the virtual hard drive file type.
Step 7: Select the type of Hardware file as VDI (VirtualBox Disk Image). It is always recommended to go for VDI in terms of ISO image. Click Next.

Step 8: Select the physical hard drive as Dynamically allocated. Now, you need to allocate the file location and size of Android from the physical hard drive on your device. Then, Click on Create.

Step 9: You have successfully created a virtual machine on your virtual box. You need to mount the iso file which is downloaded before. For that, Go to Settings >> Storage >> Load iso File >> Click Ok >> Start.

Step 10: Later, you follow the on-screen steps of OSX boot as Wizard, and then OSX will be installed in Oracle Virtual.

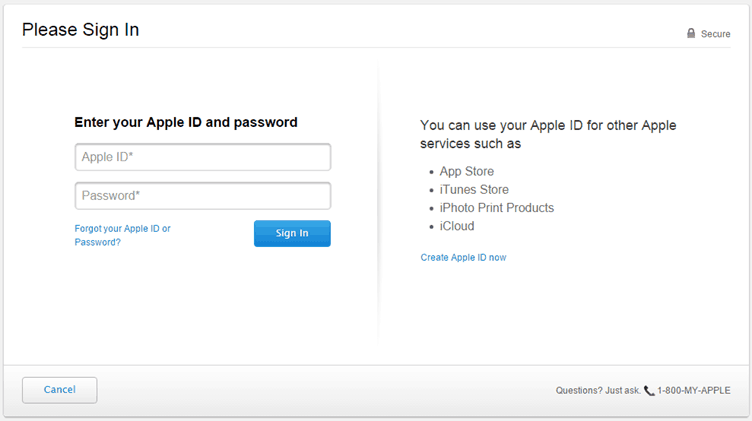
Step 11: Go to the safari browser in your Virtualbox and open the official Apple App Store. Sign in using your Apple ID in the App store. You need to enter the Apple ID and password, as shown in the image below:
Step 12: After signing, type Xcode in the search box to get the complete package. It shows you various related apps. Locate Xcode from different apps and click on Free and Download. Then, click OK to download the kit.

Step 13: After completing the installation, open it from the applications. Now, you need to provide your root credential to get access privilege to install Xcode components and modify your system settings. Enter your name and password and press OK.

Step 14: That’s it. We have successfully installed the latest Xcode version on your Windows 10, 8/8.1, and 7 PC using a desktop virtualization software VMware workstation.
 This way, you can install Xcode, app development software on your Windows PC or Laptop. Now, you can create new projects and better apps using this interface. As you are running this software on Windows, the performance and speed of Xcode won’t be extremely high.
However, it can be used for educational purposes, not for professional app developers. Now it’s time to use Xcode on our PC. So in this way, you can easily download and install Xcode on your Windows Personal computer or laptop, and you can create better apps as per your need. I hope this tutorial helps you with the best way to install Xcode on Windows 10, 8/8.1, and 7 OS running PC or laptop.
